Auto-forward From a Google Workspace Gmail Mailbox to Help Scout
Google Workspace is a full-featured business email platform that uses the Gmail interface. This article explains how to automatically forward all email from a standard Google Workspace user mailbox to a single Help Scout inbox.
Expand this list to see other options if your Google address isn't a licensed Workspace user.
- Auto-forward From a Google Workspace Group — use this if the email address belongs to a Google Group.
- Auto-forward From Google Workspace Using Routing — for Google Workspace administrators who prefer to route the email to Help Scout directly.
- Auto-forward Google Workspace Aliases — for forwarding only specific aliases rather than everything in one Gmail inbox.
Note: Once you turn on forwarding in Gmail, stop managing email there. Do not reply to or modify any messages in Gmail — doing so breaks the link to the Help Scout conversation. Any replies or updates made in Gmail will not appear in Help Scout.
Before You Start
You will need to have these things available to you before you start:
Ready? Let's Go!
-
Log in to Gmail at https://gmail.com. Click on the gear icon in the upper right-hand corner of Gmail, then click the See all settings option from the drop-down menu.


-
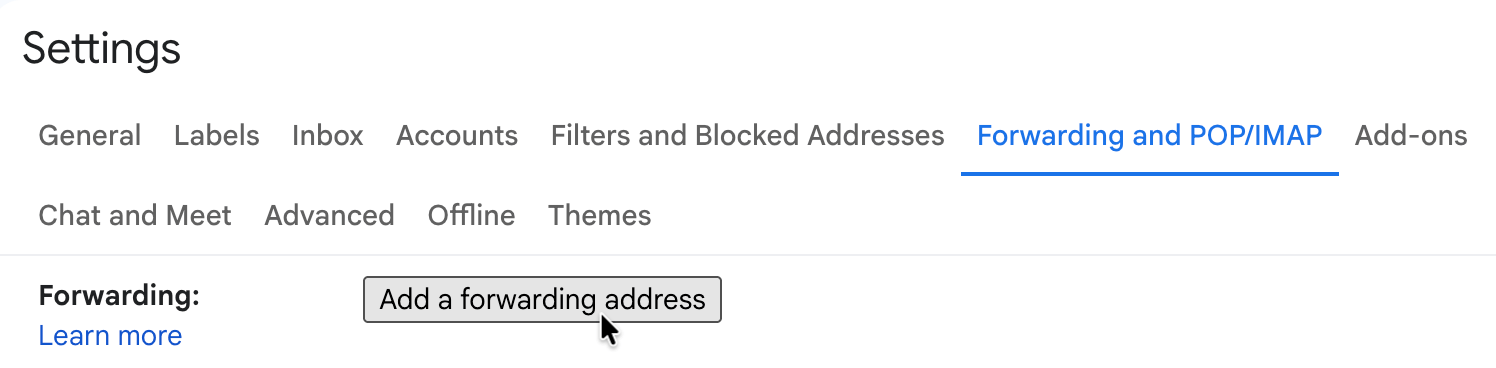
Click the Forwarding and POP/IMAP tab from the top menu. Then click the Add a forwarding address button.

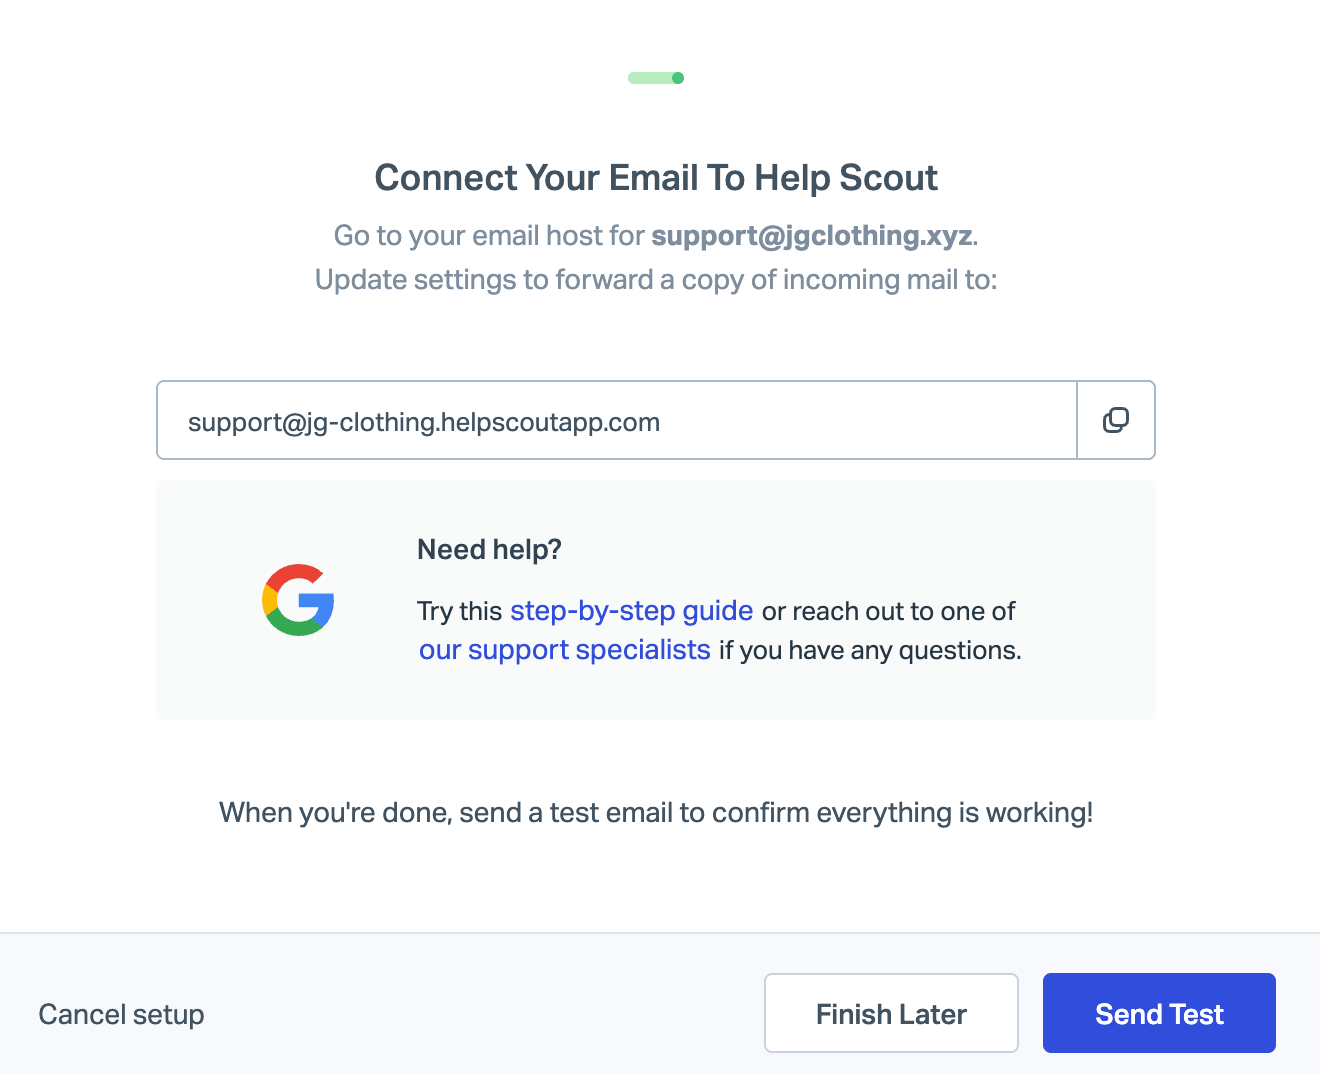
- You'll see a pop-up window asking for your forwarding address. Enter your Help Scout Inbox Address in to the text field, then hit Next. A pop-up will appear where you will be asked to confirm what you just did, hit Proceed, followed by OK in the next window to close it out.
-
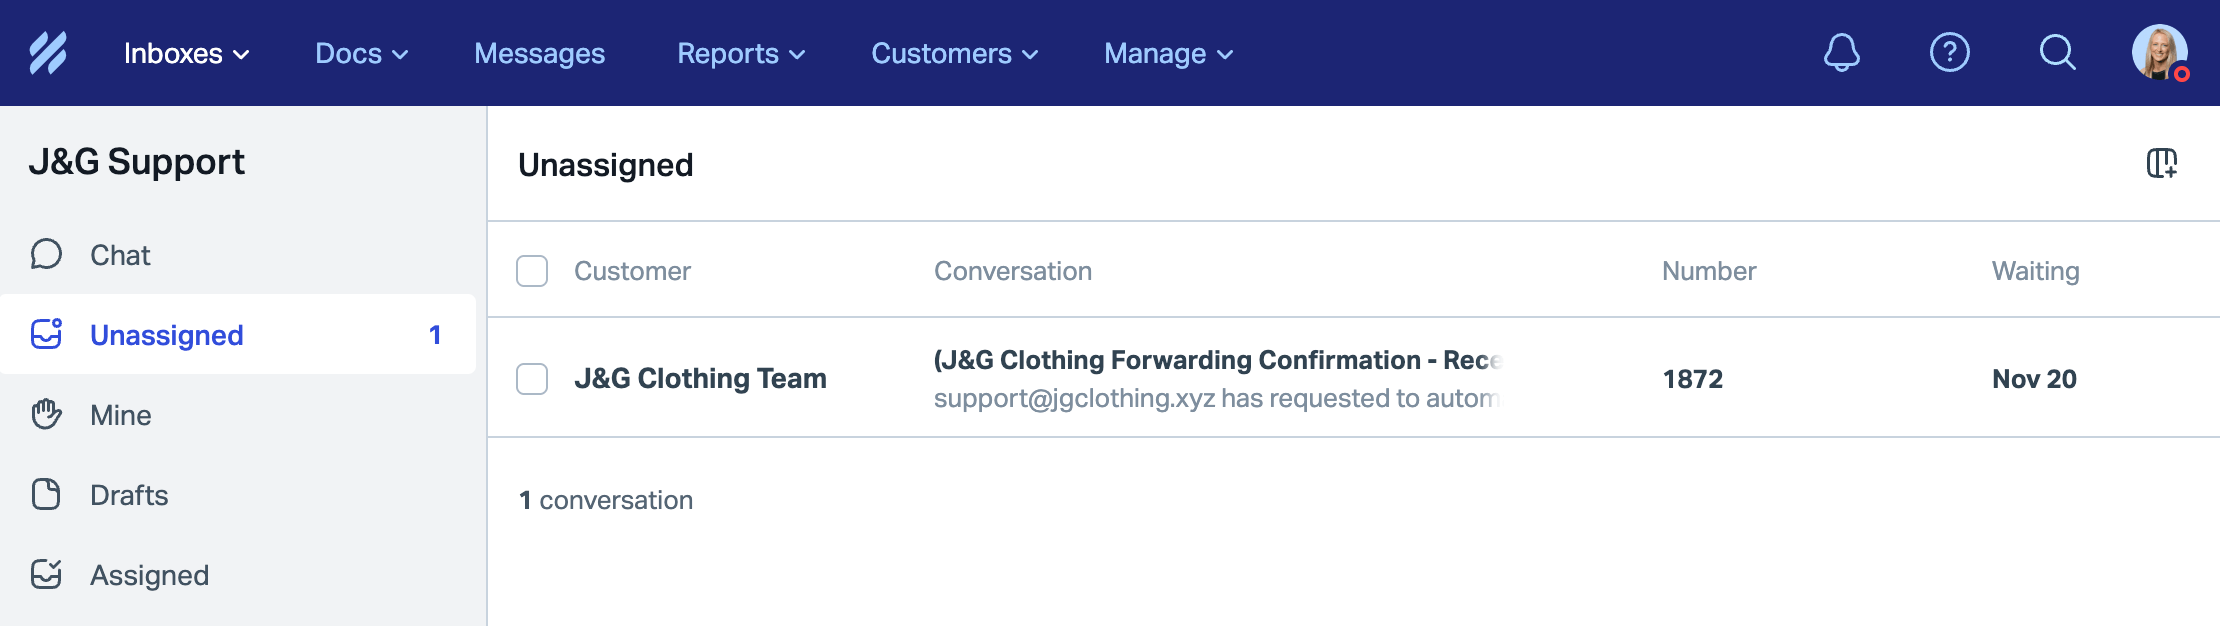
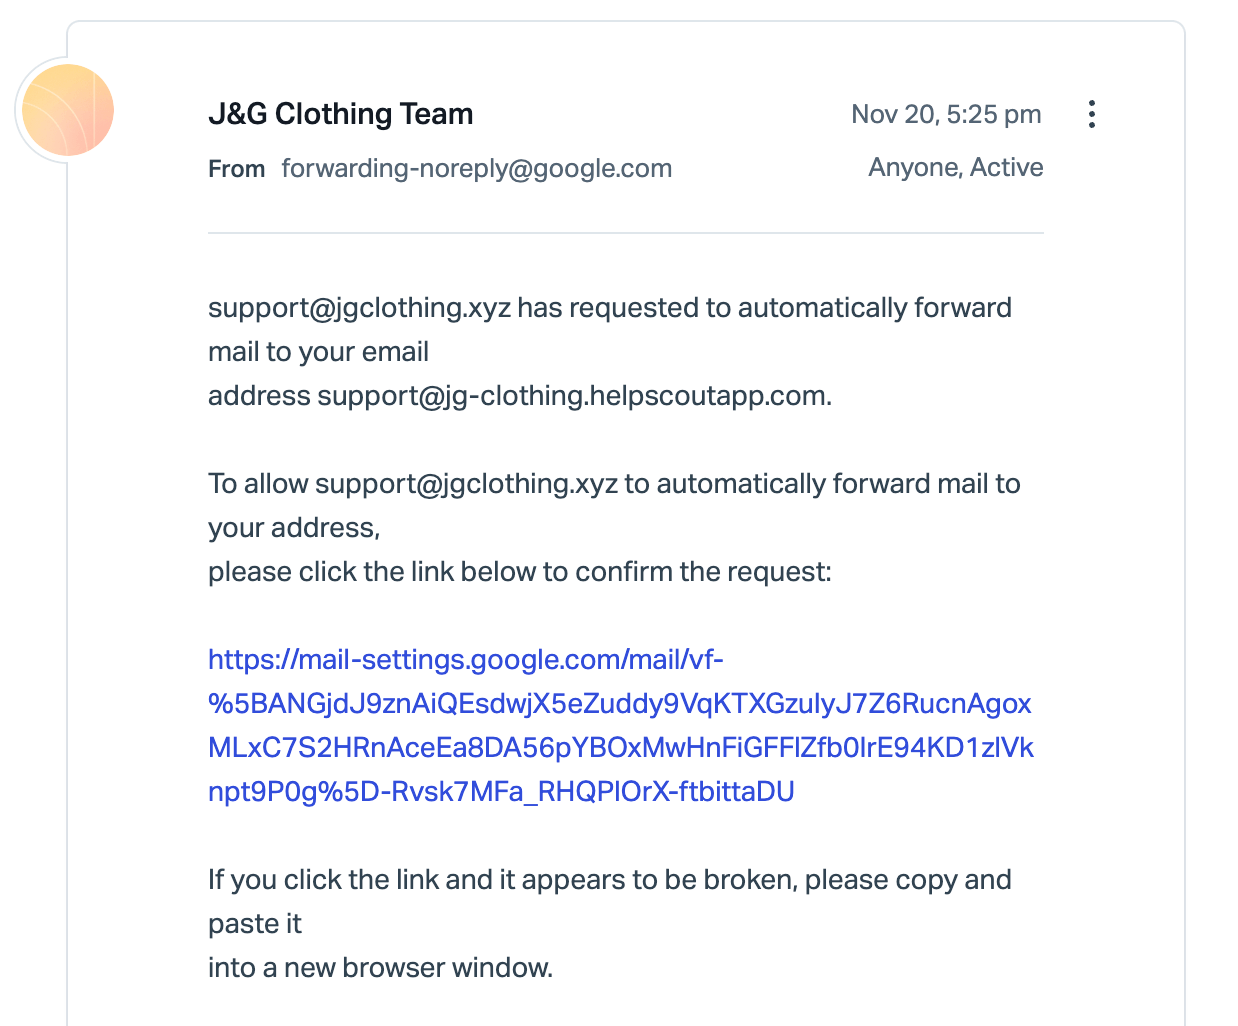
Head back to Help Scout and into your Inbox. Find the confirmation email from Google asking if you want to allow forwarding to your Help Scout Inbox address.
-
Click into the conversation, then click the link in that email to confirm and follow Google's steps in the new tab.
🚨Note: This does not mean that forwarding is turned on yet — you'll do that in the next step.
-
IMPORTANT: Head back into Gmail settings and the Forwarding and POP/IMAP tab again. Make sure you refresh the page.
Click the button next to Forward a copy of incoming mail to and make sure the forwarding address in the drop down is your Help Scout inbox address.
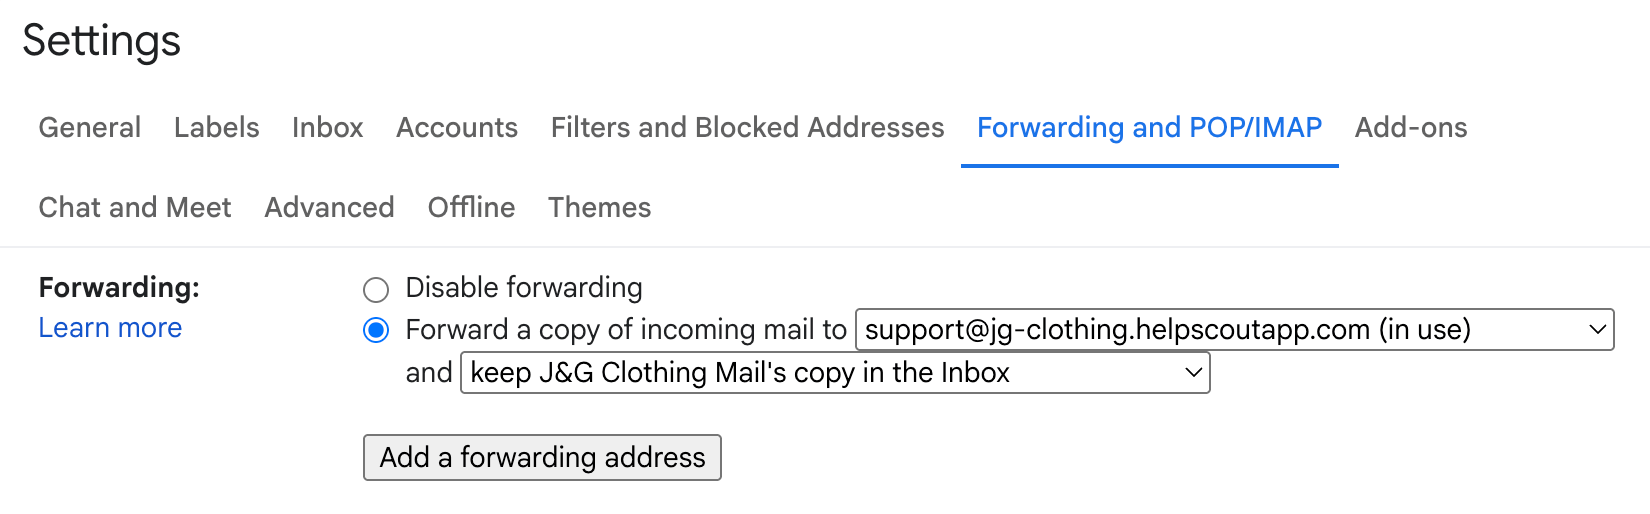
You can choose what to do with the messages in your Gmail mailbox as well. We recommend keeping a copy at Gmail, but it's up to you.
🚨 Scroll down and click Save Changes at the bottom of the page! Settings here do not auto-save.
-
Now head back to Manage > Inbox(es) in Help Scout and choose the inbox you just created. Click Send Test to confirm the forwarding is set up.


That's it! You're set! See troubleshooting steps below for help if you're not seeing emails in Help Scout after stepping through this guide.
🚨Next steps: Set up DKIM to allow Help Scout servers to send email on your behalf, or set up Google OAuth to have your email sent using your Google account.
What to Check if You Don't See Emails in Help Scout
Below are the most common issues that disrupt forwarding.
- Make extra sure you've turned on the forwarding at Gmail. Walk through Step 6 above one more time, making sure that the radio button next to Forward a copy of incoming mail to is selected, and click Save Changes at the bottom of the page.
- Check the Spam folder in Gmail. If the message you expect to see in Help Scout is sitting in Gmail’s Spam folder, it will not be forwarded. Google does not let you turn off spam detection, but you can create a filter to keep messages Google flags as spam out of the Spam folder which allows them to forward normally.
- Create a new filter in Gmail. Google has help on this here: Create filters in Gmail
- Enter
is:spamin the Has the words: field. - A warning will appear warning you not to use the word
is:in the filter, you can safely ignore it by pressing OK. - Check the Never send it to Spam checkbox.
- Click Create Filter.
- Check the Spam folder in Help Scout. Check Manage Spam and Unwanted Email for more help there.