Set Up and Manage Customer Portal
Help Scout is built to help you deliver great customer service. With Customer Portal, your customers get a secure, authenticated web experience to view and manage their support history. Instead of relying entirely on email, your end users can self-serve and track their conversation status in one centralized place.
Customer Portal is available on Plus and Pro plans. Account Owners and Administrators can configure and manage the portal settings. Company-level access is controlled by the Manage customer portal access permission, which Owners and Administrators can grant to other roles as needed. For more details on user roles, see User Roles and Permissions.
In this article
Benefits of Customer Portal
Customer Portal provides several key benefits for your team and your customers:
-
Self-service tracking: Customers can check their conversation status anytime without emailing your team for updates.
-
Organization-level visibility: Company contacts can see only conversations they started, all conversations from their company, or all company conversations except those in selected Inboxes.
-
Friction-free login: Customers log in securely using a one-time six-digit code sent to their email. No password creation is required.
-
Enhanced security: For regulated industries, the portal provides a secure, login-gated path that keeps sensitive information off unencrypted email. For more information on security compliance, see Help Scout and HIPAA.
Configure Global Portal Settings
You can set up and customize your portal directly from your Help Scout account.
To configure your global settings:
-
Open Settings (the gear icon) and select Customer Portal from the left menu and toggle the portal on to activate the feature.

-
Select a Beacon to connect to the portal.

-
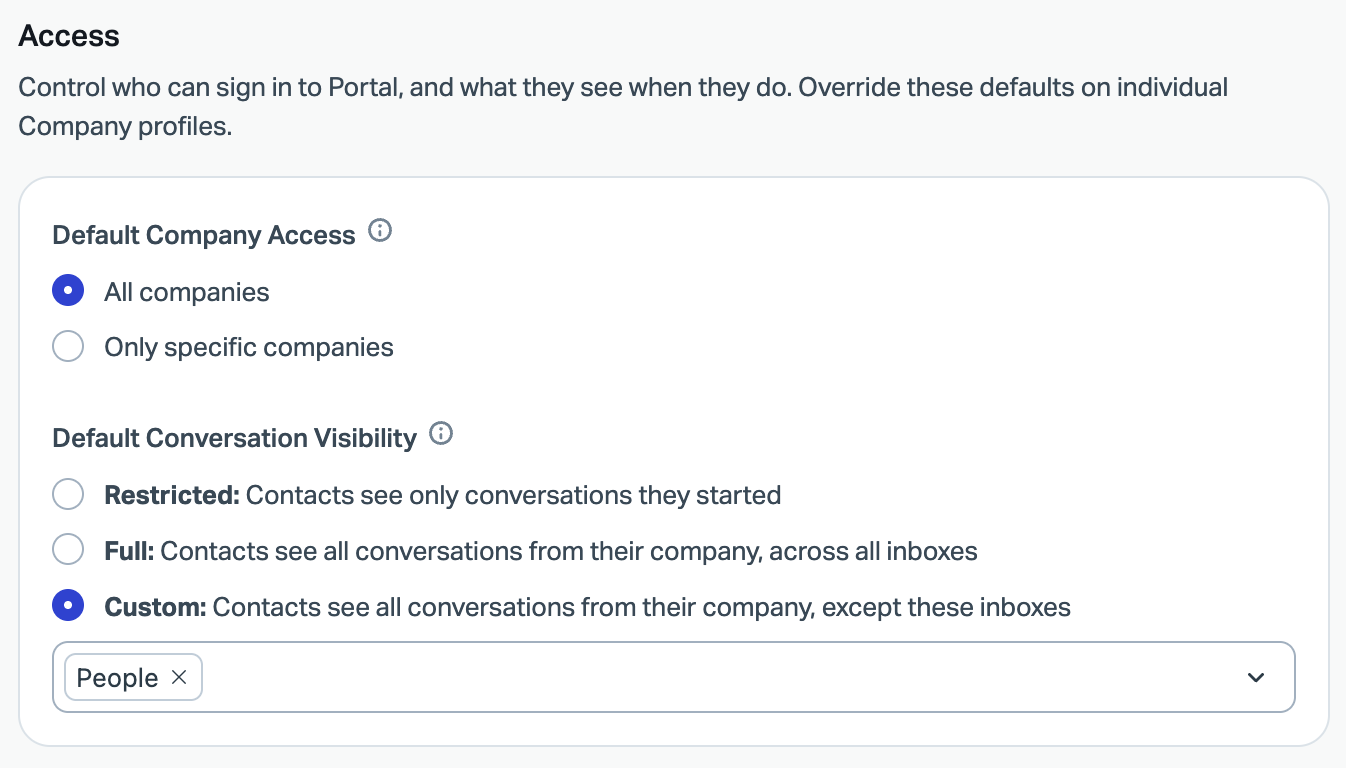
Set your default Access. You can choose to grant access to all companies or restrict access to specific companies by default. For default conversation visibility, choose Restricted for conversations contacts started, Full for all company conversations, or Custom for all company conversations except those in selected Inboxes. The contact will always be able to see their own conversations.
-
Set your Email delivery preference. If you toggle on Hide reply content, replies to your customers will not appear in their email provider. Instead, they will receive a secure message directing them to log into the customer portal in order to view the reply. This can also be set on a customer level.

-
Within Brand, you select either the Default to have elements based on the company brand or Custom and upload a logo, favicon, touch icon and select a distinct brand color.

-
Select Save for your settings to take effect.
Manage Company-Level Access
You can override global settings for specific companies to customize who can access the portal and what they can see.
To manage settings for a specific company:
-
Select Customers > Company and search for the applicable company record. For details on managing these records, see Customer Profiles.

-
Click the Customer Portal tab.

-
Enable Customer Portal by toggling on or off for that company. If your global default is set to "All companies," access is on by default. If set to "Only specific companies," access is off by default.
-
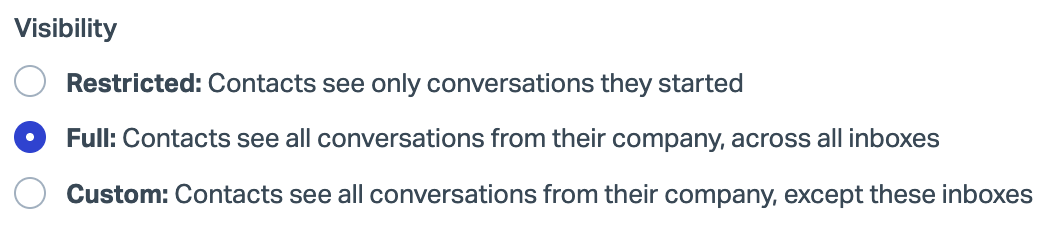
Set the Visibility level for the company's contacts:
-
Restricted: Contacts see only conversations they started.
-
Full: Contacts see all conversations from their company.
-
Custom: Contacts see all company conversations except those in selected Inboxes.
-
-
Enable or disable notification-only email. If you toggle on Hide reply content, replies to your conversations with customers from this company will not appear in their email provider. Instead, they will receive a secure message directing them to log into the customer portal in order to view the reply.

-
Restrict access to specific contacts within the company using the Enable custom access toggle if you do not want all employees to access the portal.

-
Select Save to have you selections take effect.
The End-User Experience
Your customers access the portal via a dedicated URL formatted as {slug}.helpscoutportal.com .
Authentication and Security
To log in, the customer enters their email address on the portal sign-in page.

Help Scout sends a single-use, six-digit code to their email.

The code is valid for five minutes. If a user enters an incorrect code five times, the code is invalidated.

Note: The customer's email address must match an existing contact record in Help Scout. Currently, there is no self-registration or "request access" flow.
Viewing and Replying to Conversations
Once logged in, customers see a table of their conversations (and company conversations, if enabled) with customer-facing statuses: New Response and Closed.
-
Customers can reply and attach files to conversations they personally started.
-
Customers with company-level visibility can view, but cannot reply to, eligible conversations started by colleagues. They cannot view a colleague’s conversation from an excluded Inbox, including through a direct link or conversation ID. The contact who started that conversation can still access it under My Conversations.
-
If a conversation is locked, the reply box is replaced with a New Conversation button. For more details on conversation locking, see Use Conversation Lock to Prevent Re-opening Old Conversations.
Starting New Conversations
The portal includes Get help and New Conversation buttons. Both options connect directly to your Beacon widget to surface help articles and contact forms. To learn more about setting up Beacon, see Beacon Jumpstart Guide and Manage Docs Contact With Beacon.
Notification-Only Email Mode
Notification-Only Email mode is a global setting that helps keep sensitive content out of standard email threads.
When you enable this option, contacts with portal access do not receive the actual content of agent replies in their email inbox. Instead, they receive an email notification containing a secure link to log in to the portal and read the reply and view any attachment(s).
This setting is highly recommended for healthcare, finance, and other compliance-sensitive organizations that must protect sensitive data.
Note: At this time, Notification-Only Email mode applies only to replies sent by agents. System auto-replies will continue to send standard email content.

Next Steps
Now that you have configured the Customer Portal, you can optimize the experience for your users. We recommend customizing up your Beacon to ensure customers can easily search your knowledge base or start new conversations from within the portal. See Beacon Jumpstart Guide to get started.