Use an Outlook Redirect Rule to Send Microsoft 365 Email to Help Scout
If you don't have access to the new version of Outlook and you don't have the credentials to log in at https://outlook.com for your mailbox, you'll need to use a redirect rule in the classic Outlook to get your email over.
A redirect is different from a forwarding rule and helps Help Scout parse messages correctly.
🛑 Note: You should only use a single method to get your email from Microsoft 365 to Help Scout. If you create a redirect rule and have forwarding enabled in new Outlook, Outlook on the web, or by your Microsoft 365 admin, you will see duplicate emails in your Help Scout Inbox.
Before You Start
In this article
Microsoft 365 Classic Outlook
-
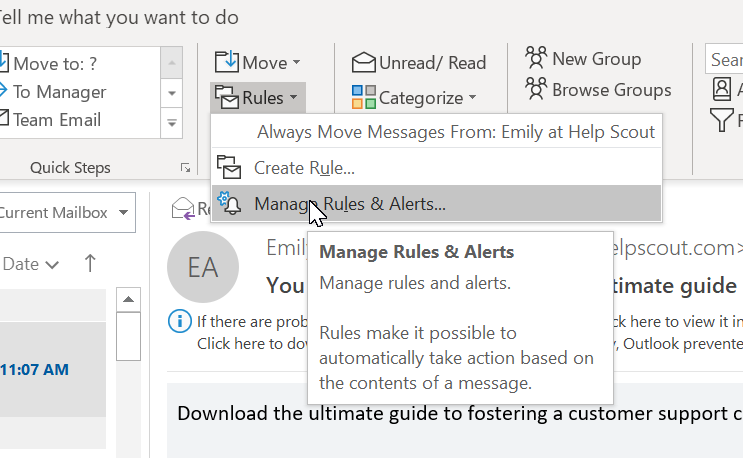
Find Rules in the top ribbon and choose Manage Rules & Alerts.... Note that Rules may be in a different place on your ribbon depending on your Microsoft 365 settings, but you are looking for the icon that looks like a folder and an envelope together. The two most common versions are shown below.


-
Click New Rule... then choose Apply rule on messages I receive under the Start from a blank rule section.


-
Click Next without choosing any conditions then click Yes on the screen confirming that the rule will be applied to every message you receive.


-
Click the checkbox next to redirect it to people or a public group in the top box, then click on the blue linked people or public group in the bottom box. This will bring up your address book. In the To field, enter the Help Scout Inbox Address, click OK to select that address. Click Finish on this screen. As the last step, click OK on the Rules and Alerts window to save your new rule.


- That will do it - head back into Help Scout to see your emails in your Inbox!
🚨 Next steps: Set up DKIM to allow Help Scout servers to send email on your behalf, or set up a Custom SMTP server to have your email sent from your own provider.
⚠️ Note: You may need to take an additional step if you're receiving bounce messages after setting up the redirect rule. Microsoft 365 spam protection might be set to block automatic forwards and redirects for your organization. Reach out to your Microsoft 365 administrator and point them over to Enable External Forwarding in Microsoft 365 for the steps they need to take to allow your email to forward to Help Scout.
Outlook 2013 or 2016
-
Click on Rules then Manage Rules & Alerts... from the Home ribbon.

-
Click New Rule... on the Rules and Alerts window, then click Apply rule on messages I receive on the first Rules Wizard screen. Click Next to advance the wizard.
-
Click Next on the Rules Wizard without specifying any conditions. You will see a popup warning "This rule will be applied to every message you receive. Is this correct?" - click Yes to continue.
-
Click the checkbox next to redirect it to people or a public group in the top box, then click on the blue linked people or public group in the bottom box. This will bring up your address book. In the To field, enter the Help Scout Inbox Address, click OK to select that address. Click Finish on this screen. As the last step, click OK on the Rules and Alerts window to save your new rule.
- That will do it - head back into Help Scout to see your emails in your Inbox!
🚨 Next steps: Set up DKIM to allow Help Scout servers to send email on your behalf, or set up a Custom SMTP server to have your email sent from your own provider.