Use DKIM to Help With Email Delivery
DKIM stands for DomainKeys Identified Mail. DKIM allows the receiving email server to verify the authenticity of messages sent from your domain, which can help your emails to make it through spam blockers.
This article will help you with setting up the records so that those emails will pass DKIM validation if you are using a custom address and using Help Scout servers to send.
You do not need to set this up if you are using the default Help Scout Inbox Address (e.g support@yourcompany.helpscoutapp.com) or sending through your email provider instead.
In this article
Why DKIM Matters
Ever get an email that looks like it’s from PayPal but isn’t? That’s a spoof. Because email domains are easy to fake, DKIM helps by adding a hidden signature in the message headers that the receiving server checks against the domain’s public key.
On its way to your customer's mailbox, your email is typically scanned by a spam filter, which looks for a valid DKIM signature. They may block your email if they are unable to verify that DKIM signature.

DKIM & Emails Sent From Help Scout Servers
If you send from your own address through Help Scout’s servers, all outgoing mail is DKIM-signed. By default, messages are sent from helpscout.net “on behalf of” your domain and signed for helpscout.net.
When you add two CNAME records at your DNS host to point to our DKIM key, messages are sent from — and signed as — your domain. This helps your mail pass spam filters.

Create CNAME Records for DKIM
You need 2 CNAME records at your DNS hosting provider. When a recipient server checks for the DKIM key at your domain, these records will forward that check over to Help Scout servers for the key.
- strong1._domainkey.yourdomain.com will point to strong1._domainkey.helpscout.net
- strong2._domainkey.yourdomain.com will point to strong2._domainkey.helpscout.net
Don't know who your DNS hosting provider is? Your DNS hosting provider is likely to be the service where you've registered the domain name or the hosting service where you host your website. MX Toolbox's DNS Lookup is a super helpful tool to discover public information about your domain. Enter your domain there and you'll see a box near the bottom that will show the provider for your domain.
Each DNS hosting provider will have their own terminology and formatting for creating a CNAME record.
For example, creating the strong1._domainkey CNAME record at a cPanel based host will look like this:

The same CNAME record at GoDaddy would look like this:
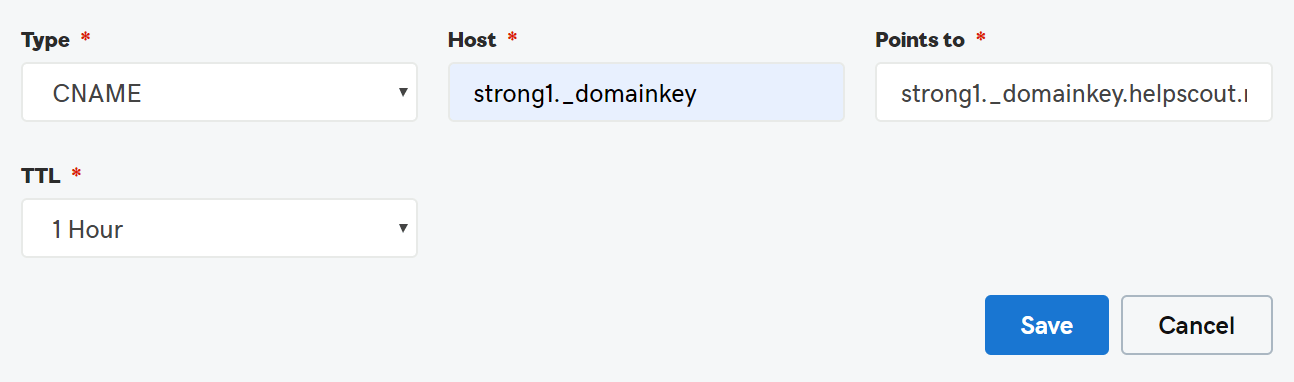
Then at Cloudflare your form would look like this:

We’ve included links to some popular providers’ help pages on CNAME or DNS below. If you don’t see your provider listed here, you need additional help, or you’re not sure how to log in to your account at your DNS provider, you’ll want to reach out to their support for an assist. The support team at your DNS provider will be able to help you find the right format if these articles don't get you there!
- GoDaddy: Domains Help: Add a CNAME record
- Namecheap: How to Create a CNAME Record For Your Domain
- Network Solutions: How Do I Manage DNS and Advanced DNS Records?
- DNSMadeEasy: CNAME Record
- Squarespace Domains: DNS Records for Web Hosting: CNAME
- Hover: Managing DNS records
- Rackspace Cloud DNS: Manage DNS records in the MyRackspace Portal
- Bluehost: What Is A CNAME - How To Create & Edit CNAME
- Wix: Adding or Updating CNAME Records in Your Wix Account
- Cloudflare: Create CNAME Records at Cloudflare to Work With Help Scout
Note: These providers may make changes to their knowledge bases or help pages that we aren't aware of. If any of these links do not lead to a help article about CNAME or DNS records for that provider, please let us know!
Check Your Records
After you've created the records at your DNS provider, you can check to see if they're working here:
Note: This form will not work if you are reading this from the Beacon in Help Scout. See below for instructions on how to check in the app itself!
DKIM Record Checker
Enter your domain name (or the email address you use to send from) below to verify that your DKIM records are correctly set up.
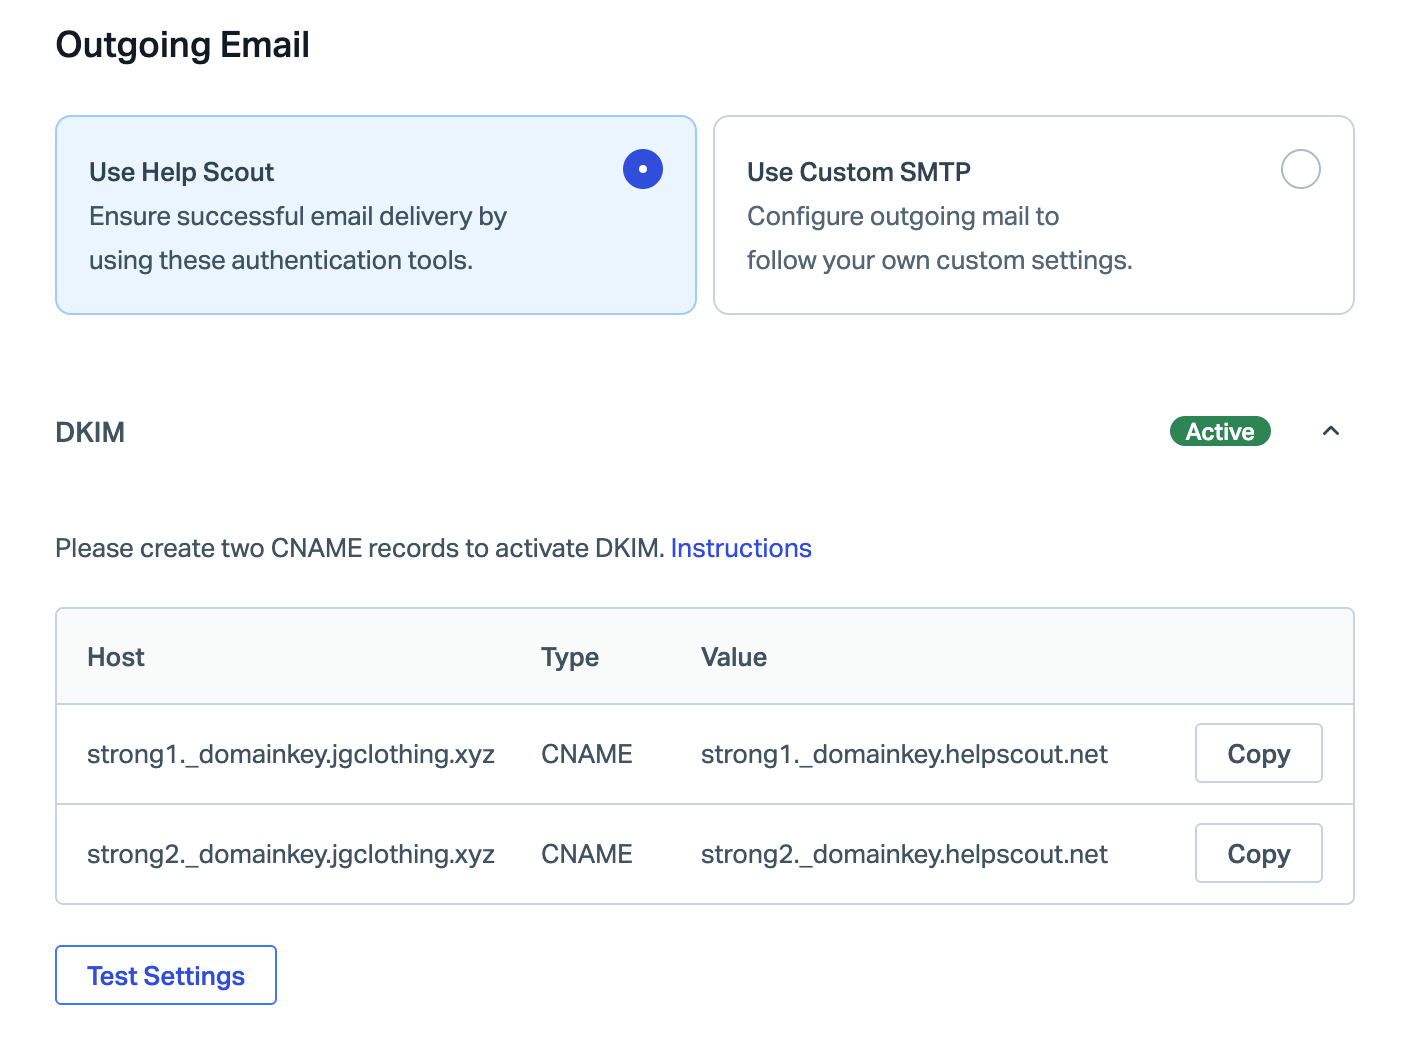
Or open your Help Scout Inbox and head over to Manage > Inbox(es) > [Choose your Inbox] > Outgoing Email and click the Test Settings button. If a valid CNAME record is found for your domain, you'll see the DKIM status indicator change to Active.
Troubleshooting DKIM Verification
Not seeing that turn to green? If it's been less than an hour since you added the CNAME records, hang tight! DNS propagation can take a little time to update. Check back after an hour to test settings again.
If it's been more than an hour and the checker in Help Scout is still not showing that we're able to verify it, this usually means there's a problem with your CNAME records. Your best first step is to check your CNAME records with a tool like MX Toolbox to lookup your CNAME.
When you enter strong1._domainkey.yourdomain.com into that lookup, it should return with strong1._domainkey.helpscout.net in the Canonical Name result.

If your result doesn't show the helpscout.net entry, head back into your DNS provider, and double check that the format is set the way they want it to be. If you've entered it as strong1._domainkey.yourdomain.com as the host or name, try removing yourdomain.com so that it's only strong1._domainkey in that field.
Still stuck? Give us a shout and we'll take a peek — let us know what domain you're working with and which DNS hosting provider you're using to help us get started!