Create a New Beacon
Beacon, our dynamic corner widget, seamlessly integrates live chat, AI Answers, Docs help, and proactive Messages — all in one convenient location! With no limits on the number of Beacons you can create on paid plans, our intuitive Beacon builder walks you through creating a Beacon in just a few clicks.
You must have the Messages & Beacons: Create, edit, delete permission to create a new Beacon. See User Roles and Permissions for help.
Head to Manage > Beacons to start.
If this is your first Beacon, click Create a Beacon in the middle of the page. If you've done this before, you'll see New Beacon in the top right corner.
-
Name and button settings
Give your Beacon a name and choose your color from the dropdown menu. Pick a button style — this is the clickable button that will appear on your website or app after you install the Beacon.
If you choose Icon and text or Text only a text box will appear for you to define the Button Text.
Choose Hidden if you are going to create your own custom button or link to open Beacon using the Beacon JavaScript API.
-
Chat and email settings
Choose the contact options you want for your Beacon. A Beacon can only be associated with a single Inbox.
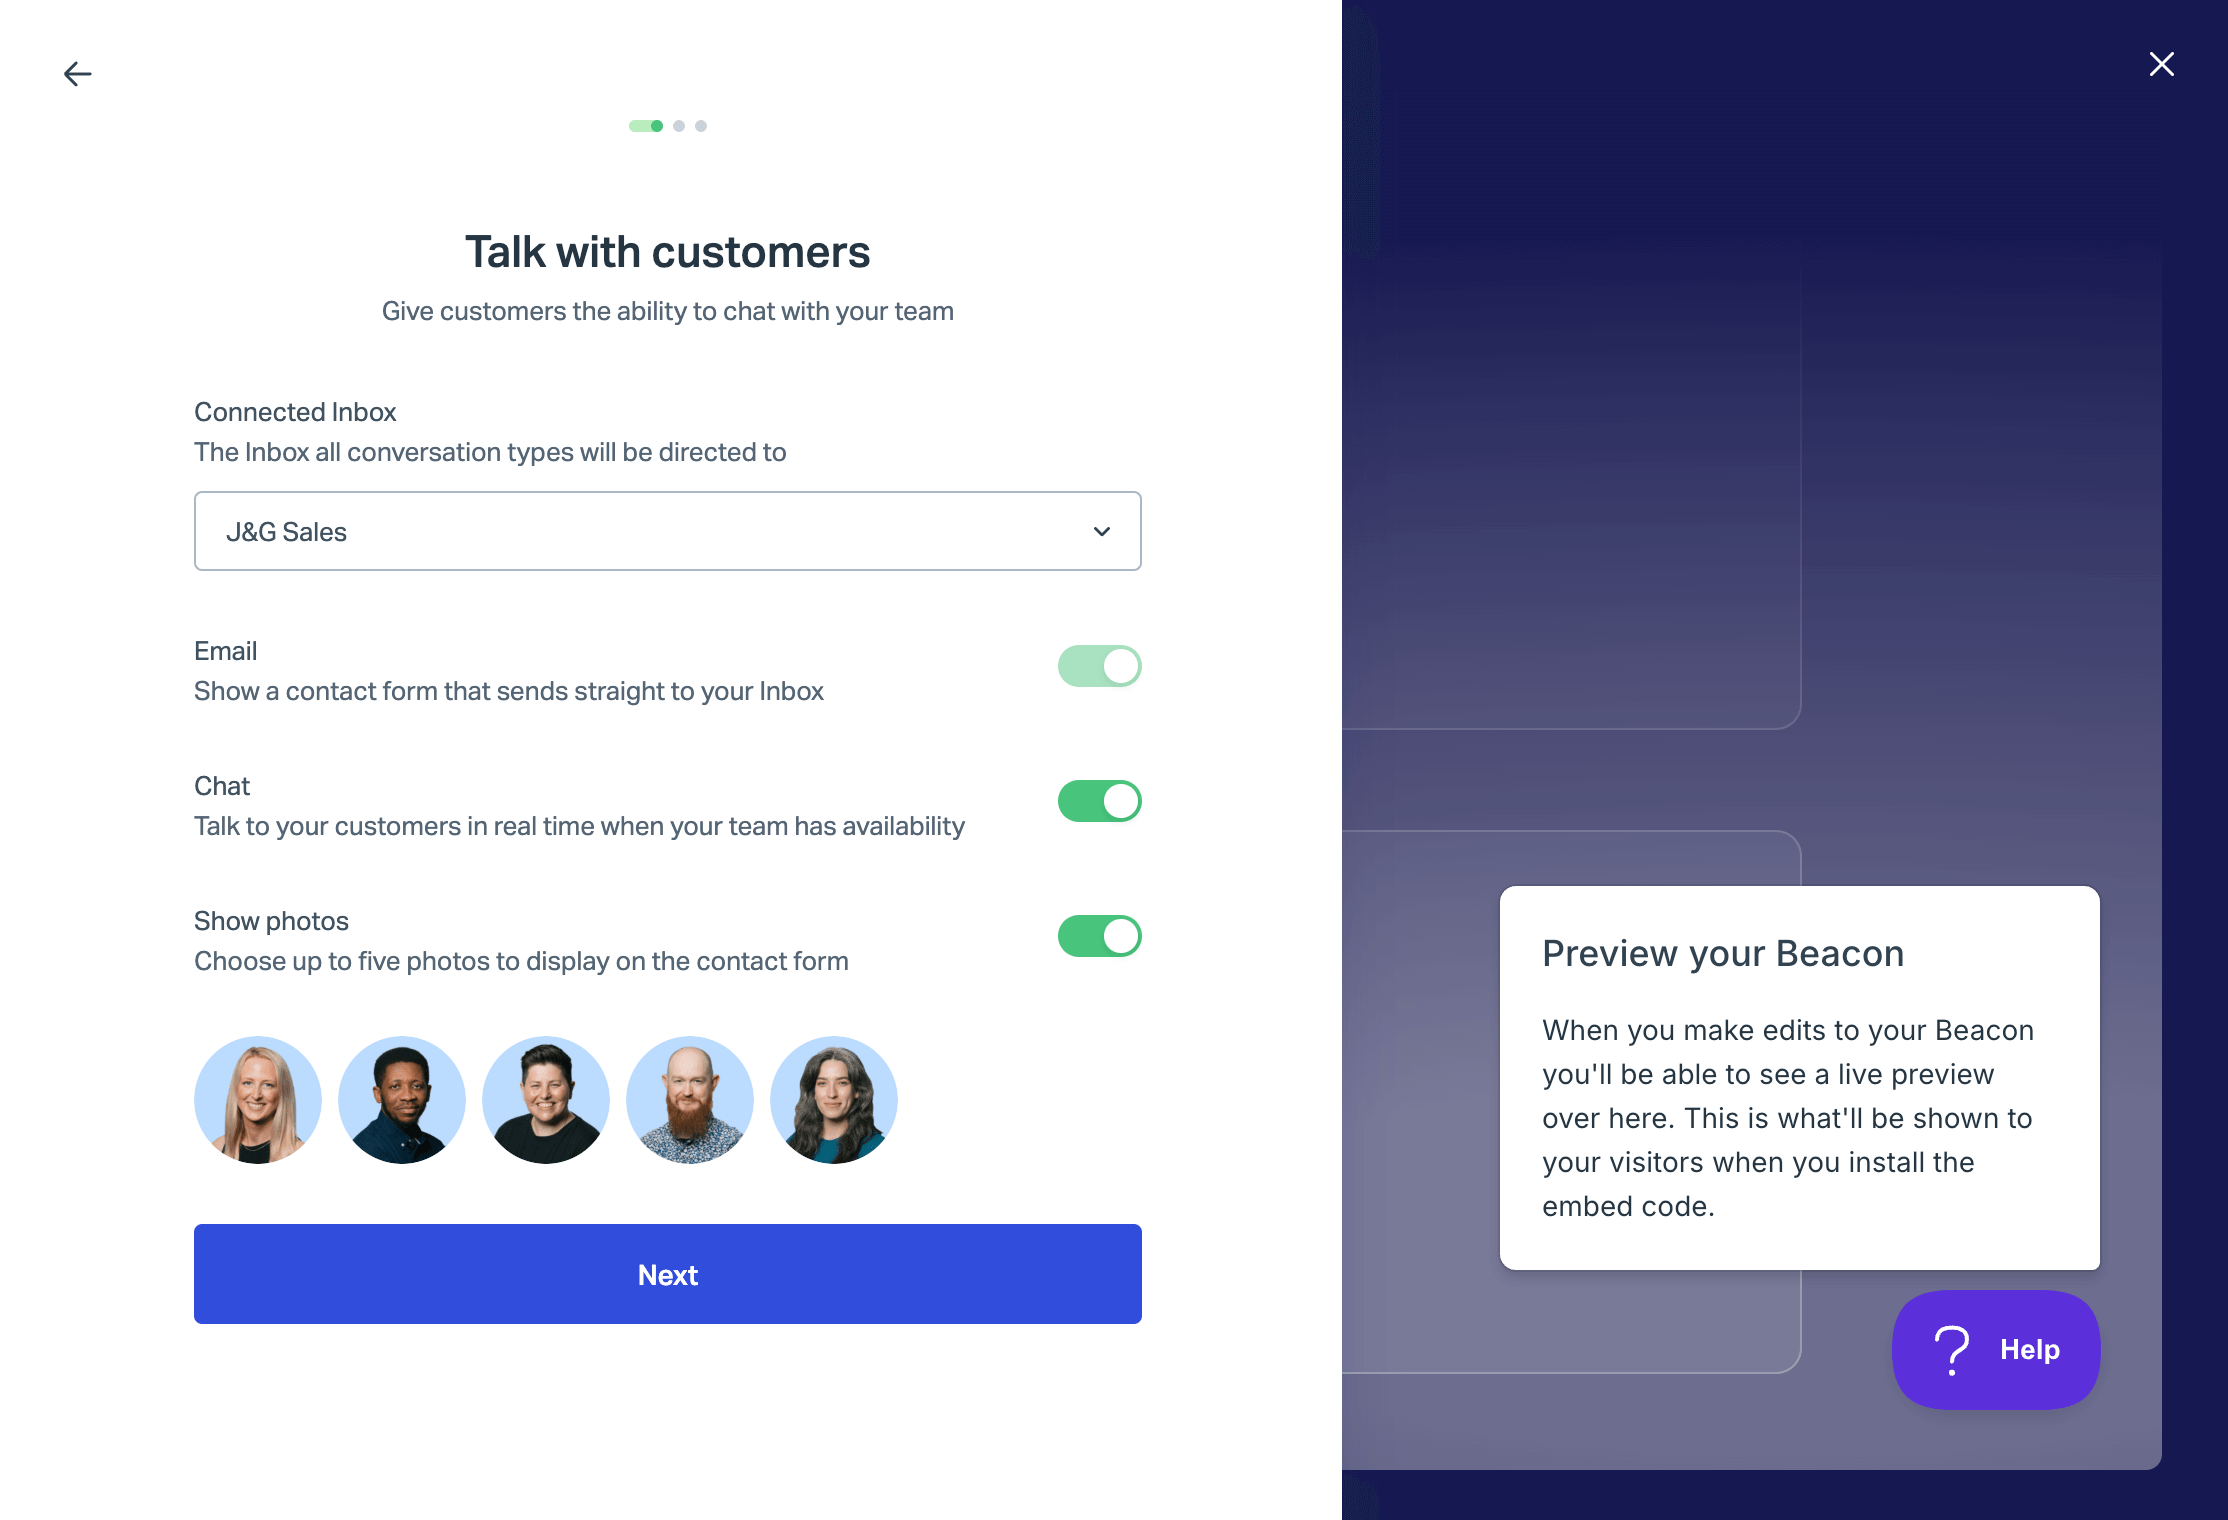
Note: You cannot toggle Email form off if you have yet to create a Docs site Collection. Similarly, Email form must be on if Chat is on. Beacon will fallback to email when your team is not available to chat. Check out User Availability and Maximum Chats for more information.
-
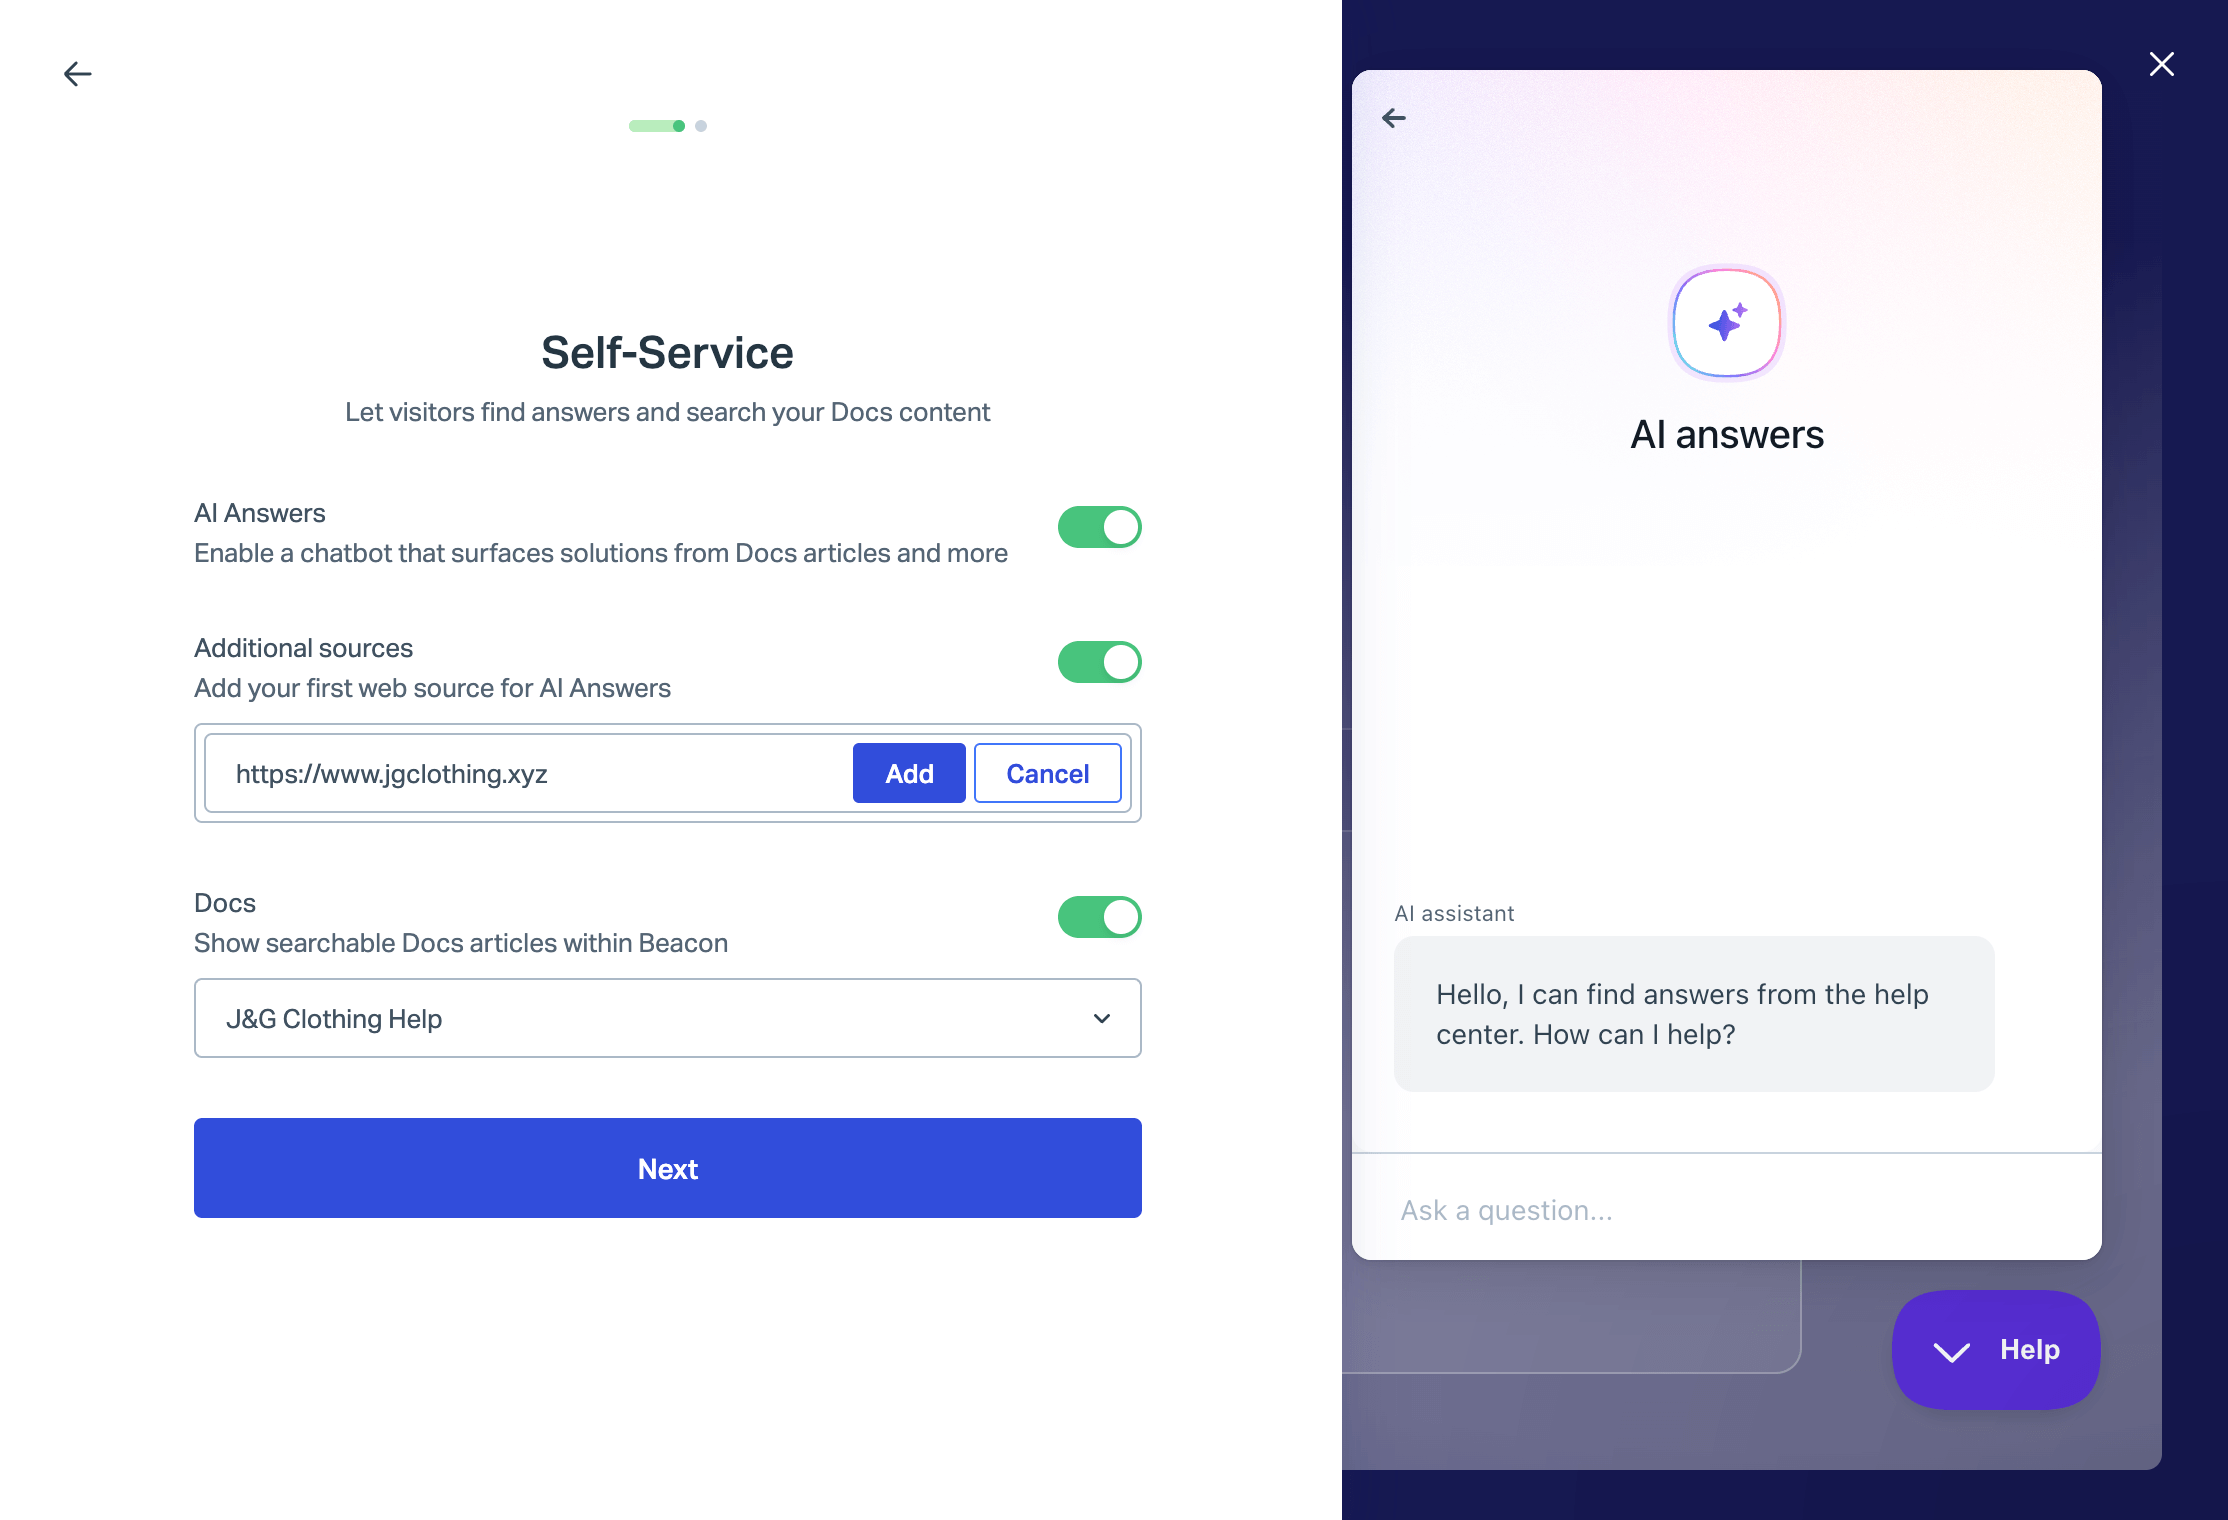
Self service options
Choose the Docs site you would like your Beacon to use, if any. If you have yet to create a Docs site Collection, you will not see this screen during Beacon setup. You can edit these settings after you have created your Beacon and your first collection.
Enable AI Answers to offer an AI-driven chat option for your visitors. See more here: AI Answers
You will be able to select a mode for Beacon to use with some configurations after you have completed the initial setup. Choose to Continue Editing at the end of this set up, and see Work with Beacon Modes for more details on those options.
-
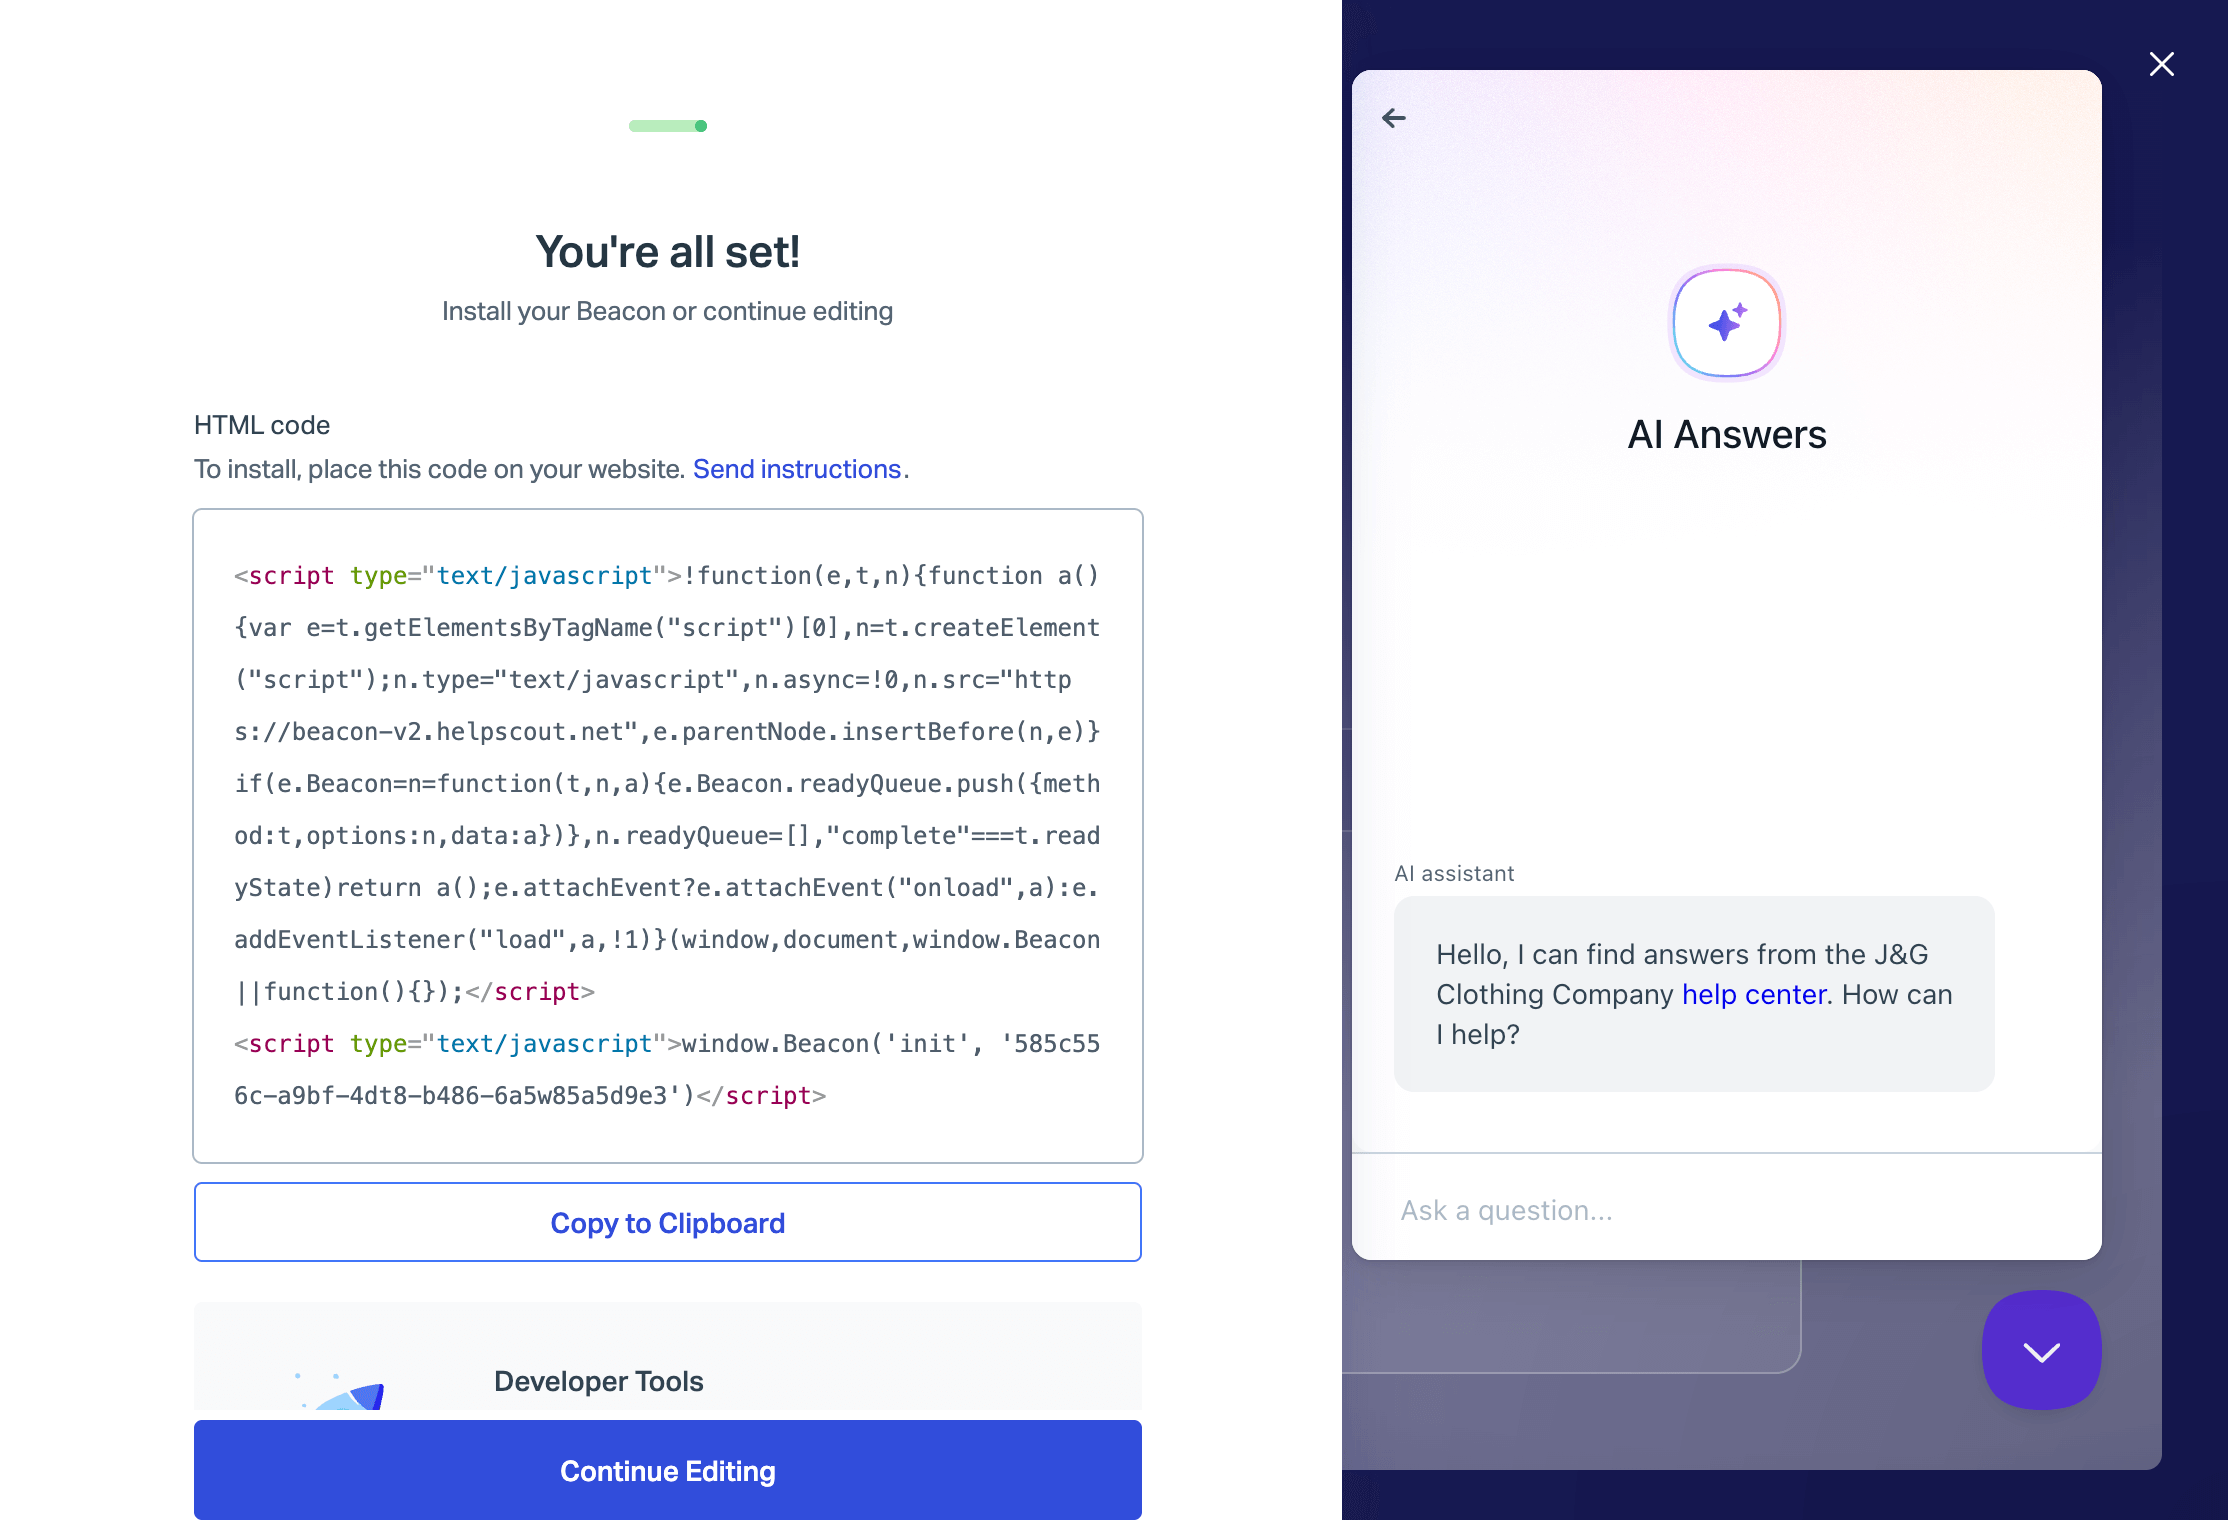
Grab the Installation Code
Click Copy to copy the installation code for your Beacon to your clipboard, or choose the Send instructions link to quickly email that code to the person who will be installing it on your site or app — or just email it to yourself!


Want to customize your Beacon installation even more? You got it! Just head over to the Beacon JavaScript API — grab your favorite developer (or dig in yourself if you've got the skills) and make that Beacon do what you want.
You're all set! Change any of these settings any time by going to Manage > Beacons, choose the Beacon, then click Edit Beacon. If you're using the default installation code, changes made in the settings will update your Beacon automatically wherever it's installed — you don't have to change the code on your site or app!