Enable SSO with OneLogin as the Identity Provider
Single sign-on (SSO) for your domain within Help Scout allows your Users to easily and securely log in to their accounts. This article will help you get set up if your IdP is OneLogin. For more general information on adding and using SSO with Help Scout, check out Enable SSO in Your Account.
This feature is available on the Pro plan.
In this article
What is SSO?
Single sign-on (or SSO) is a way to authenticate and log in to an application with just one set of credentials, rather than having to set up multiple usernames and passwords across different platforms. It's a more secure process and prevents potentially losing or forgetting login credentials since it's stored through another service.
SAML is an open standard for allowing single sign-on between 2 systems: A Service Provider (that's Help Scout) and an Identity Provider (that's the system storing your organization's user database e.g. Okta, OneLogin etc.).
Setting up SSO With OneLogin
This section explains step by step how to configure SAML Single Sign-On between Help Scout and OneLogin as the Identity Provider.
Note: Service Provider (Help Scout) provisioning is not supported. Accounts should be created first in the IdP or Help Scout, and then authenticated via the IdP prior to logging in to Help Scout. IdP provisioning is supported, and the IdP settings should ensure the Help Scout application is only available to the users who require a Help Scout account.
You'll need to be the Help Scout Account Owner or an Administrator to get this setup for your account and your account must be on a Pro plan.
1
Log in to Help Scout, then navigate to Manage > Company > Authentication.
2
Do not toggle Enable SAML just yet! Take note of the Post-back URL and the Audience URI at the bottom of the page in your Help Scout account. You will need to copy and paste this information into OneLogin. You'll come back to this page to Enable SAML before the end.

3
Log in to OneLogin as an administrator, go to Applications > Applications. Click the Add App button in the top right corner.


4
Search for test connector on the Find Applications page. From the filtered list pick SAML Test Connector (Advanced) for SAML 2.0

5
Enter Help Scout as the Display Name of the new app, and make sure Visible in portal is on. If you'd like to upload a Help Scout logo, click on the Rectangular icon and Square icon and select the images you want to use. You can take these from our logos file. Click the Save button when these are all set.

6
You'll find a new left side navigation menu after saving. Click Configuration. Paste the Audience URI from Help Scout in to the Audience (Entity ID) field. Paste the Post-back URL from step 2 in to both the ACS (Consumer) URL and Recipient fields. Paste the regular expression listed below in to the ACS (Consumer) URL Validator.
[-a-zA-Z0-9@:%._\+~#=]{2,256}\.[a-z]{2,6}\b([-a-zA-Z0-9@:%_\+.~#?&//=]*)

7
Click Save to store the app settings.
8
Click Parameters in the left navigation menu. Click the + button to add a new field.

9
Type in email as the name in the popup and check Include in SAML assertion, and click Save to go to the next screen. Click on - No default - in the value column on the next screen and select Email as the value from the dropdown. Click Save.

10
Repeat this process for two more fields. Create a field first_name with the value mapped to First Name, and last_name mapped to value Last Name. You will have email, first_name, and last_name when you're back on the Parameters screen.

11
You'll need to grant your users permission to the application you just created, either by adding to individual Users or by adding to Roles or Groups within OneLogin according to how you prefer to manage your Users there.

12
Navigate back to the Help Scout app and select SSO from the left side navigation. Copy the SAML 2.0 Endpoint (HTTP) and click View details for the X.509 Certificate. This opens a new page where you can click the Download button to download the onelogin.pem file. You will need both the SAML 2.0 Endpoint (HTTP) and the X.509 Certificate in step 13.


13
Head back to Help Scout Manage > Company > Authentication. Click Enable SAML. Paste in the SAML 2.0 Endpoint (HTTP) from OneLogin to the Single Sign-On URL field and upload the X.509 certificate from OneLogin here. Toggle Force SAML Sign-in if you would like your Users to only log in to Help Scout via SSO with OneLogin. Even if this is selected, an Account Owner will always be able to log in to Help Scout with their account password (this is to prevent the Account Owner from getting locked out). Don't forget to click the Save button.

14
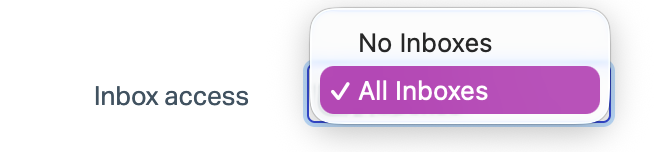
By default, new users will have access to no Inboxes when they first log in. If you want to allow access to all inboxes in the account upon the first log in, select All Inboxes in the Inbox Access drop-down. Click Save.
Single Sign-On using OneLogin is all set! Users need to log in via the identify provider prior to logging in to Help Scout.